

Chronicles of a Chalkboard
- Mia Hable
- Mar 15, 2018
- 4 min read


In every home, there are the large main staples of your design aesthetic that you do not change, such as the dining table or couch, but there are also transient accessories that you bring out for each season or holiday. Infusing these different accessories into your home for each season allows your home to feel fresh and unique for each holiday. Accessories such as pillows and throws are easy enough to store in a closet or attic space, but what do you do about artwork? You might want to switch out what goes on your walls from summer to winter, or from year to year. As your style evolves you may find you gravitate towards something that is different and does not fit in with the rest of your artwork. So what is the solution? I am going to walk you through how I solved this problem in my own home and how a little DIY can be just what your home needs.
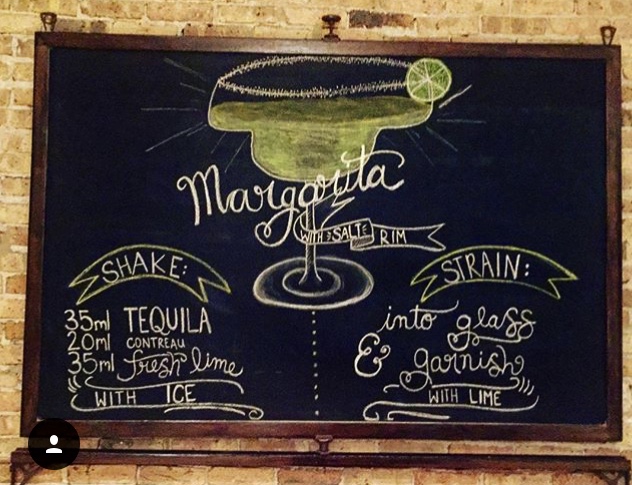
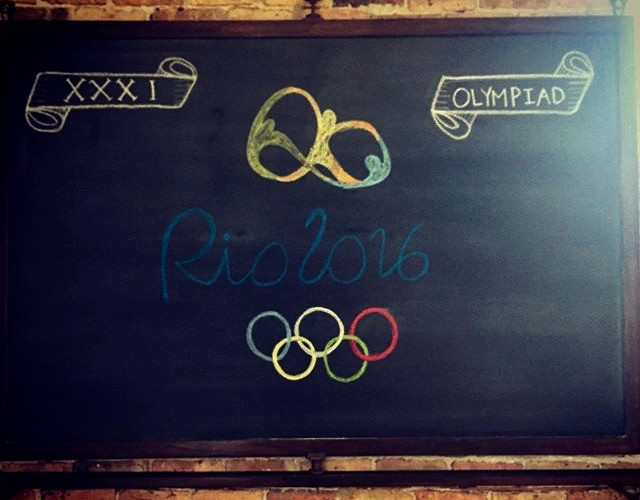
I have made a conscious effort to keep my artwork fairly neutral. I have driftwood pieces and geometric designs created from plant material, but my favorite piece is not even art, rather it is a platform for me to create art. It allows me to infuse different colors and styles into my décor as often as I like. Many people have painted a wall with chalkboard paint to help keep them organized or to provide their children with a fun activity, but I wanted something a little more polished and a bold statement piece in its own right. So I set about creating a chalkboard to hang in my dining room.
I found an old, rolling chalkboard in the basement of a Catholic school. With most schools transitioning to all white board or smart boards, schools often have these old chalkboards just sitting in their storage space. Once I dug out the chalkboard and removed the frame from the rolling part (I did keep the hardware, it would prove useful in hanging the chalkboard on the brick) my first step was to give the chalkboard a thorough and deep clean.
Once my chalkboard was free of any lingering dirt and cobwebs, I sanded down the frame using a handheld sander and a medium sandpaper (150 grit) and then switched to a fine (220 grit) for finishing touches. Once my frame was sanded down to the natural wood, I vacuumed all the dust away and wiped it down with a slightly damp cloth to remove any grime. Next I chose to make my chalkboard magnetic. My home does not have a magnetic refrigerator so I am constantly looking for a place to hang wedding invitations and other important papers. This was a perfect solution, all it required was a can of Rust- Oleum Magnetic Primer. I highly recommend Rust- Oleum Magnetic Primer; it will turn any surface into a magnet. I used a small foam roller and a foam brush for the cutwork and three coats of magnetic primer later my chalkboard was ready to be painted with black chalkboard paint.
Once the magnetc primer dried overnight I painted the chalkboard with Rust –Oleum Flat Black Chalkboard Paint (there are many colors of chalkboard paint so pick whichever one speaks to you). I love how easy this paint was to work with. You need to use foam brushes and rollers so you avoid brushstrokes and bristles in your chalkboard and you need to work quickly, as the paint dries fast, but it is easy to apply and looks great after two coats. Next I stained my frame to match the existing wood in my home, and it was ready to move from the garage to the dining room.
Once my chalkboard was dry, I seasoned it by rubbing the side of a piece of chalk all over the newly painted surface and erased it. This step will prevent ghosting (when a faint image remains on the chalkboard after it has been erased) and save you from having to apply another coat of paint. Then I hung the chalkboard on my brick wall using as much of the original hardware as possible for an authentic look.
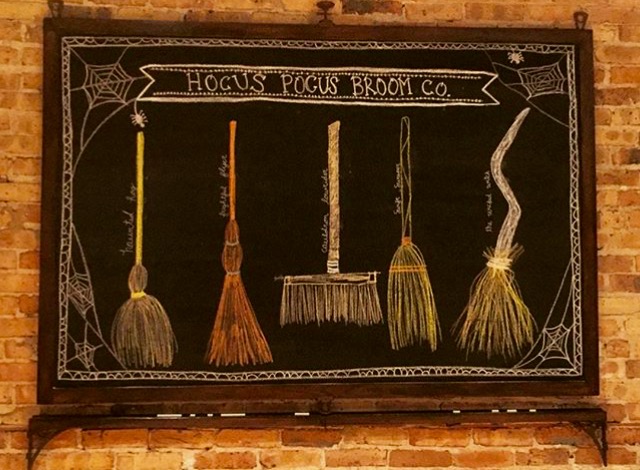
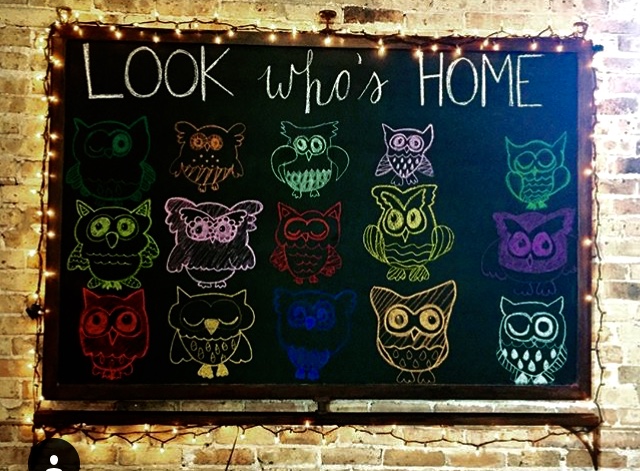
Now each season, party or holiday that rolls around I create a chalkboard. These chalkboards are fun and feed my creative soul while also adding a fun decoration to my home that is easy to change out with the swipe of an eraser. Sometimes I change the chalkboard every few weeks, others I leave up for months on end. All I need to create a fun chalkboard is a general idea and Pinterest. I find inspiration in many different holiday boards and free printables; then I recreate anything I like on my chalkboard. The hardest part can be learning different font types. If you are interested in typography, I found Hand Lettering 101, by Chalkfulloflove to be a very helpful step by step tutorial in creative lettering.
Each time I do a chalkboard I refine my drawing skills and feel excitement for creating something new. Friends and family seem to love the chalkboard and it has now become the unofficial photo corner of my home. Any group shot or selfie seems to take place in my dining room. The kitchen may be the heart of the home and the TV the focus on most weeknights, but the chalkboard art has made the dining room the place to be for a party. By cleaning up a discarded and forgotten chalkboard and giving it a little DIY love, I have created an artistic focal point in my home that can be as bold or understated as I choose.
SaveSaveSave


Mình có lần lướt đọc mấy trao đổi trên mạng thì thấy nhắc tới bongdaso.org trong lúc mọi người đang bàn luận về kết quả các trận đấu, nên cũng mở ra xem thử cho biết. Mình không tìm hiểu sâu, chỉ xem qua trong thời gian ngắn để nhìn cách bố trí thông tin, tỷ số và các mục liên quan. Cảm giác là trình bày khá gọn, các phần rõ ràng nên đọc lướt cũng không bị rối, với mình như vậy là đủ để nắm thông tin cơ bản rồi trên bongdaso.org.